
Introduction:
Cloudways provides a user-friendly platform for managed cloud hosting, making it easy for users to deploy and manage applications. If you’re ready to sign up for Cloudways, this step-by-step guide will help you navigate the signup process and start on the platform.
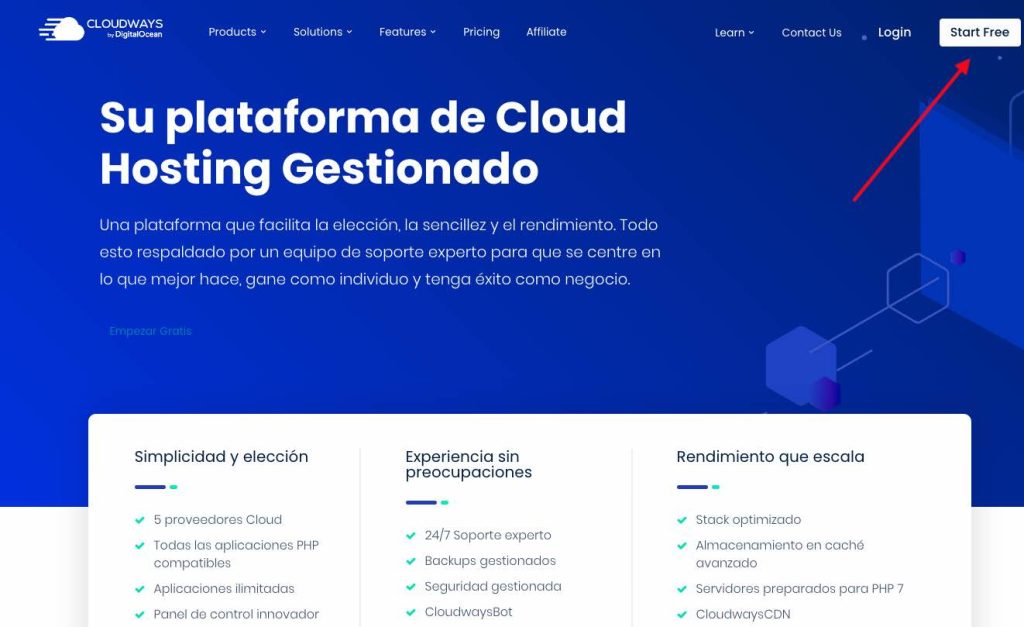
Step 1: Visit the Cloudways Website:
Navigate to the Cloudways website.
Step 2: Click on “Get Started Free”:
On the Cloudways homepage, click the button “Get Started Free” located at the top right corner.
Step 3: Fill Out the Sign-Up Form:
Enter your email address, password, and the name of your desired Cloudways server in the sign-up form.
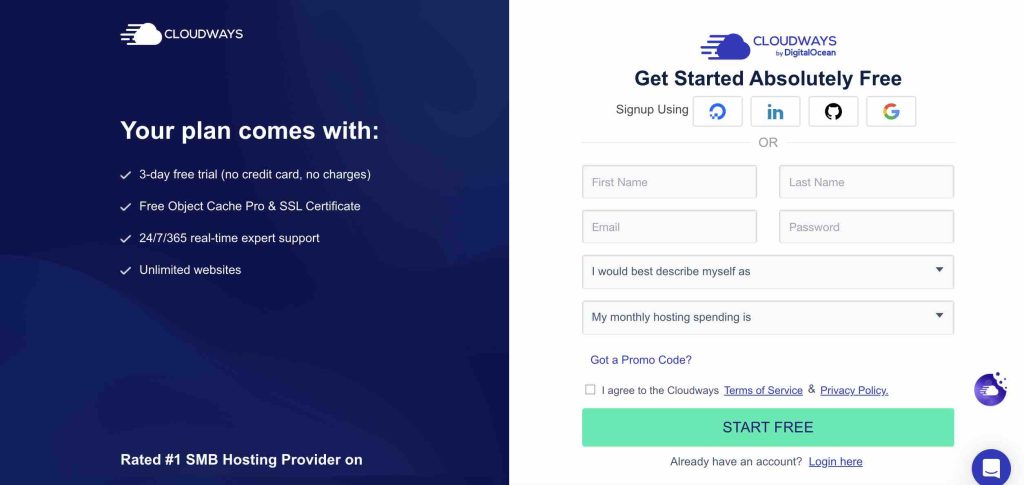
You can also choose to sign up using your Google, LinkedIn, or GitHub account for added convenience.
Step 4: Verify Your Email:
Once you’ve filled out the sign-up form, Cloudways will send a verification email to the address you provided.
Check your email inbox and click on the verification link to verify your email address.
Step 5: Set Up Your Account:
After you verify your email, Cloudways will redirect you to the platform to set up your account.
Provide additional details such as your name, company name (if applicable), and contact information.
Step 6: Choose Your Cloud Provider and Server Specifications:
Select your preferred cloud infrastructure provider from options like AWS, Google Cloud Platform, DigitalOcean, Linode, or Vultr.
- AWS (Amazon Web Services): AWS is one of the largest and most comprehensive cloud platforms globally, offering a wide range of services, including computing power, storage, databases, and more. It provides scalability, flexibility, and reliability, making it suitable for businesses of all sizes.
- Google Cloud Platform: Google Cloud Platform offers a suite of cloud computing services, including computing, storage, machine learning, and data analytics. It emphasizes scalability, security, and innovation, with a global network infrastructure designed to deliver high performance and low latency.
- DigitalOcean: DigitalOcean has a reputation for its simplicity and developer-friendly approach. It offers cloud computing services, such as virtual servers (droplets), managed databases, and object storage, with transparent pricing and straightforward management tools.
- Linode: Linode provides cloud hosting services with a focus on simplicity, performance, and customer service. It offers virtual servers (Linodes) with flexible configurations, predictable pricing, and a user-friendly control panel.
- Vultr: Vultr offers high-performance cloud infrastructure services, including compute instances, block storage, and dedicated cloud compute instances. It emphasizes simplicity, reliability, and cost-effectiveness, with global data centers and flexible pricing options.
Choose your server specifications, including server size, location, and operating system.
Step 7: Launch Your Server:
Review your server configuration and click on the “Launch Now” button to deploy your Cloudways server.
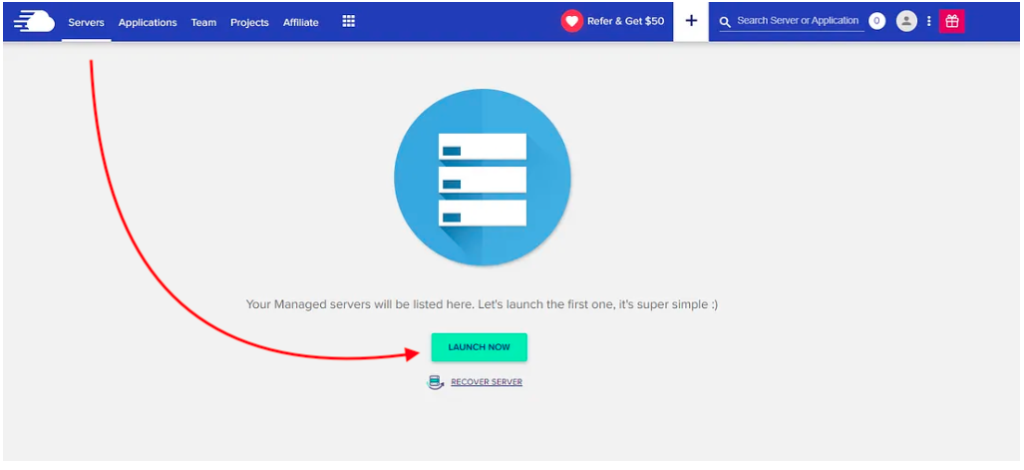
Cloudways will provision your server and provide you with access to the platform’s intuitive control panel.
Step 8: Start Deploying Applications:
Once you deploy your server, you can start deploying applications such as WordPress, Magento, Joomla, Drupal, Laravel, and more.
Use the Cloudways control panel to manage your applications, monitor server performance, and access additional features and services.
Conclusion:
Signing up for Cloudways is quick and easy, allowing you to deploy and manage cloud servers and applications with minimal hassle. By following this step-by-step guide, you can start on Cloudways and effectively develop and expand your online projects using its robust features and managed hosting services. Visit the Cloudways website today and start your cloud hosting journey with confidence.
For more information, check out our Cloudways Review or visit the Cloudways website.
Leave feedback about this